
Creating professional sound in a home recording studio can be an asset for any producer, musician, or artist. It allows for a great deal of flexibility, allowing you to experiment with sounds and achieve the highest audio quality with the resources you have.
But how do you go about designing a home recording studio and working on mixing audio that will ensure the best quality sound production like the professionals? This article will explore it all.
Here we bring you the solutions to creating a professional sound, a complete beginner’s guide to mixing audio in a home recording studio.
Let’s dive in!
Home Recording Studio – Equipment Essentials
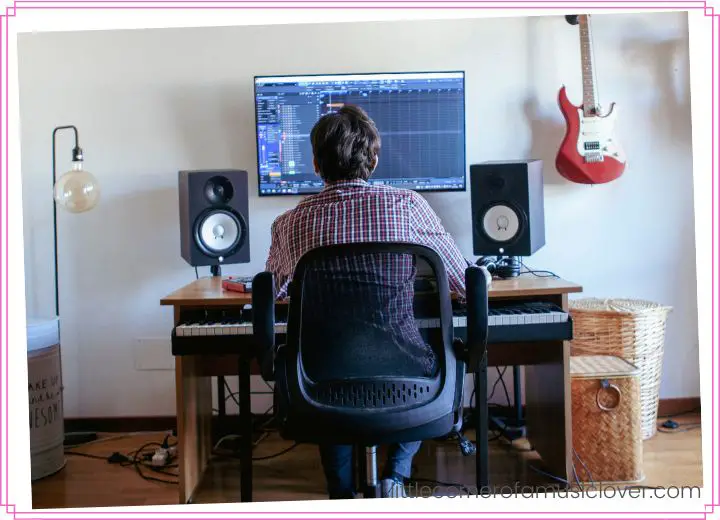
Creating a professionally produced sound at home is easier than ever with the proper recording studio equipment. The essential items include a computer, audio interface, microphone, headphones, and speaker monitors.
A laptop or desktop computer is the foundation of any home recording studio, and an audio interface is needed to connect instruments, microphones, and studio monitors to the computer.
Additionally, a quality microphone is essential for capturing audio, while studio monitors and headphones help to monitor sound like in a professional studio environment and listen to recordings.
With the right recording studio equipment, a musician can produce high-quality demo recordings conveniently, making it easier to submit their music to record labels. Or go the full independent route and publish it directly to streaming services via free music distribution.
Now, all that’s left is to get creative and start making music!
Pre-Production Preparation
Pre-production is crucial in creating professional sound at your home recording studio. This is like preparing for a recording session, choosing suitable microphones to set up your recording space, and more.
Here are a few tips to help you get started:
Choose the right microphone. Not all microphones are created equal, and different types of microphones will produce different results. Use a microphone made specifically for recording voices, for instance, if you’re recording vocals.
The same goes for instruments – make sure you choose a microphone designed for the specific instrument you’re trying to record.
Set up your recording space. The acoustics of your recording space can significantly impact the quality of your recordings.
Try to record in a space with hard surfaces (such as concrete or tile) that will reflect sound waves and produce a more echoing environment.
Acoustic treatment panels can also be used to assist in managing the noise in your area.
Use headphones. Headphones are essential for monitoring your recordings as you make them. Without headphones, it’s easier to hear what’s being recorded, leading to mistakes.
To concentrate on your recording, ensure you have a good set of closed-back headphones that will filter out any outside noise.
Plus, calibrate your monitors. This ensures that you hear the audio accurately and will help you make better mixing decisions as an artist.
Follow Recording Techniques and Tips
Clipping is when your audio signal gets too loud and distorts. To avoid clipping, ensure you’re not overloading your input levels and supervising your meters while recording.
- Use EQ to balance the frequencies in your mix. Using an EQ tool, you can increase or decrease a specific range of frequencies in your audio input. This can help ensure all the instruments in your mix are audible and set frequency-wise together.
- Use compression sparingly. Compression lowers the dynamic range of an audio signal – meaning the difference between the loudest and quietest parts of the signal gets smaller. When used judiciously, compression can add punch and presence to a recording; however, too much compression can sound unnatural and ‘squash’ a mix.
- Use Dynamic Processors. Dynamic processors can tame a particular instrument, such as a guitar or a vocal.
For example, a compressor can reduce the guitar’s dynamic range to create a cleaner sound. A limiter can be used to prevent a vocal from becoming too loud.
Dynamic processors can help enhance the final mix and provide a professional touch to your recordings when used with caution and in the proper context.
Mixing Basics
Mixing balances all the different sounds so they come out perfectly. It’s an essential part of creating a professional sound that many overlook. Thus, here are a few basics to get started.
- Understand the basics of tonality. Tonality is the overall sound created by all the different elements in your mix and can be divided into two categories: harmonics and timbre.
Harmonics are the frequencies that make up your composition’s main melody or chord progression, while timbre is more concerned with how each instrument sounds.
Carefully balancing these two elements can create a potent mix that stands out from the crowd.
- Reverb is another essential factor when creating a professional-sounding mix, as it helps add depth to your tracks and gives them a sense of space.
It reflects sound off surfaces like walls or ceilings, which creates an ambient effect that adds atmosphere to any track.
With careful use of reverb, you can make any track sound bigger and fuller than it would typically be without it.
- Lastly, always keep balance in mind. This is especially important when mixing multiple tracks. You don’t want one track to overpower the others, so finding the right balance is vital.
Advanced Mixing Techniques
As we continue to explore creating a professional sound in a home recording studio, we’ll look at some advanced mixing techniques to help you achieve a more polished and convincing mix.
1. Automate Volume Levels
Automation allows you to make subtle adjustments to volume levels over time, which can help create a more dynamic-sounding track.
You can automate things like vocals or instruments to stand out during certain sections or even fade out during others – this will give your mix more movement and variety throughout its duration.
2. Stereo Imaging
Stereo imaging is a vital advanced mixing technique to create a three-dimensional sound that stands out from the mix.
It involves using equalization, panning, and time-based effects to expand the mix’s width and give the impression of greater depth.
Just manipulate the stereo image of each track in the mix and then blend them to create a cohesive and immersive sound stage.
3. Advanced Mixing Techniques
Advanced mixing techniques involve adding effects and processing to help enhance a song’s overall sound. Reverb, delays, and chorus effects can give a recording more depth and character.
Additionally, various kinds of processing, such as compression, EQ, and saturation, can be used to shape the sound of an individual track or the mix as a whole.
These techniques can bring out the best in a song while also creating an exciting and unique sound.
Mastering
Mastering is the process of fine-tuning the sound of a recording, making sure all the tracks fit together cohesively and creating an overall sonic balance.
It can make a big difference in the quality of your recordings, and it’s something that every serious home recording studio should consider doing.
There are numerous approaches to mastering. For example, you can perform the task using alternative applications or hire a qualified engineer.
If you’re just starting, doing it yourself is the best option. However, some great online tutorials can help you get started.
No matter how you approach it, mastering is integral to getting professional music for your home recordings. So if you’re serious about making great music, make sure to give it a try.
Conclusion
Creating a professional sound for your audio recordings in a home studio requires a combination of factors, such as proper microphone techniques, choosing the right equipment, and mastering the art of mixing.
With a basic understanding of these critical elements, and consistent practice and experimentation, you can achieve a polished and professional sound in your home recordings.
Remember to seek additional resources and continue educating yourself on the latest techniques and trends in audio mixing to improve your skills and produce high-quality recordings continually.
FAQs
1. What is Audio Mixing?
Audio mixing involves blending individual audio tracks to create a single track with multiple elements.
This process requires an experienced audio engineer to ensure each track is balanced in the mix and the overall sound is as cohesive as possible.
It involves carefully manipulating volume levels, equalization, panning, and other effects like reverb and compression.
2. What are the five methods of sound production?
The first is transduction, which involves converting energy from one form to another, such as mechanical energy to electrical energy.
The second is vibrating air columns, which are the vibration of air molecules through a medium such as a wind instrument.
The third is vibrating strings, which are strings’ vibrations through a medium like a guitar.
The fourth is vibrating membranes. The vibration of a thin membrane passes the vibration onto another medium, like a drum.
The fifth is vibrating plates, the vibration of plates or panels of a material such as metal or wood.
3. What are the five elements of audio?
Audio production has five main elements: the sound source, recording equipment, processing and editing, playback and monitoring, and delivery.
The sound source is the origin of an audio recording and can consist of a live performance, a microphone, or a music library.
Recording equipment captures the audio and can be digital or analog. Processing and editing involve techniques that add effects such as compression, equalization, and reverberation to the audio.
Playback and monitoring involve listening to the audio to check for technical issues.
Delivery is the final step used to distribute the audio to the public.
4. What Is The Best kHz For Recording Vocals?
Ans: 44.1 kHz is a common format for recording vocals when you’re integrating aspects of music production only. But if you’re planning to incorporate the music in a video format, record on 48 kHz.
5. What Mic Is Better For Recording, Condensing or Dynamic?
Ans: Choosing between a condenser microphone and a dynamic microphone depends on recording needs and the environment.
Condenser microphones are generally more sensitive and capture a wider frequency range, which is ideal for capturing vocals and detailed acoustic instruments in controlled studio settings.
Dynamic microphones are more rugged and can handle high sound pressure levels, best for live performances and capturing louder sources like drums and electric guitars.