
Today, the home recording studio is no longer strange to everyone. With economical cost, high convenience, you can easily build a dream studio to satisfy your passion as well as earn extra income.
How to build a home recording studio for voiceovers? Let’s find out how to do it.
The method to build a home recording studio for voice overs
Many people can fall into a state of not knowing where to complete the room. However, your worries will be relieved if you follow the process of building a home recording studio in the following steps:
- Prepare the necessary equipment for the studio
- Find a location for the studio
- Construction and soundproofing studio
- Finish the design
What exactly needs to do at each stage? Read more here.
Equipment for the studio
A perfect studio needs a lot of different equipment. The number of machines will depend on your financial level.
However, a well-organized and responsive studio for the job is indispensable with the following tools:
- Computer
- Micro
- Audio interface
- Shield Pop
- Pair of headphones
- Support software
With recording, each of the above devices must meet certain criteria. So the following suggestions will help you easily choose a suitable machine at an affordable price.
#1. Computer
A computer with a powerful processor and plenty of RAM will be great for storing your perfect impromptu recordings. Therefore, you need to invest in a quality machine.
Your dream workspace would not be complete without a computer, the means of storing all your recordings. Later, it also helps you adjust the sound and send the finished version to the client.
Therefore, this technological device should be a top priority and invest a lot in it. A great recommendation you should choose is the Apple PC. It seems that most people who work with computers select this company’s products.
That doesn’t mean you have to buy the same computer. You can completely choose products of other brands to match your financial ability and preferences. However, those machines must ensure a smooth processor and large RAM.
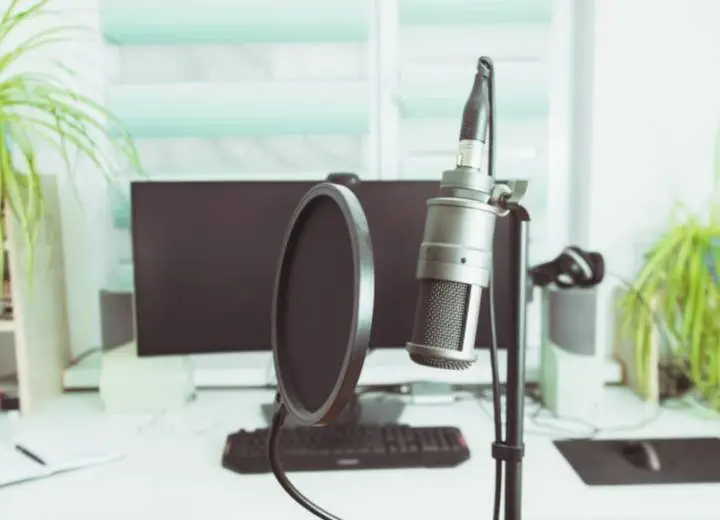
#2. Studio Microphone
It is impossible to record without a microphone, so choosing this machine is as important as a computer. You should select mics with strong audio signals and good recording. The condenser mic is an excellent suggestion.
A pickup mic with a strong audio signal will capture a large sound range. That means it will take all of what you emit, no matter how loud.
Besides, a good microphone will easily recognize the voice to be up when you speak softly. These characteristics are very suitable for voice actors when transforming into characters of different emotional levels.
When recording, your sound may be distorted, and the timbre may not be as beautiful. So a condenser mic will overcome those disadvantages.
Some well-known brands that provide quality mics that you should be into are Shure, AKG, Electro-voice.
#3. Audio interface
For a small amount of money, you can have a USB that replaces the functionality of the audio interface.
However, you will not be able to get better sound quality without this device. Better yet, choose to purchase a version as quickly as possible.
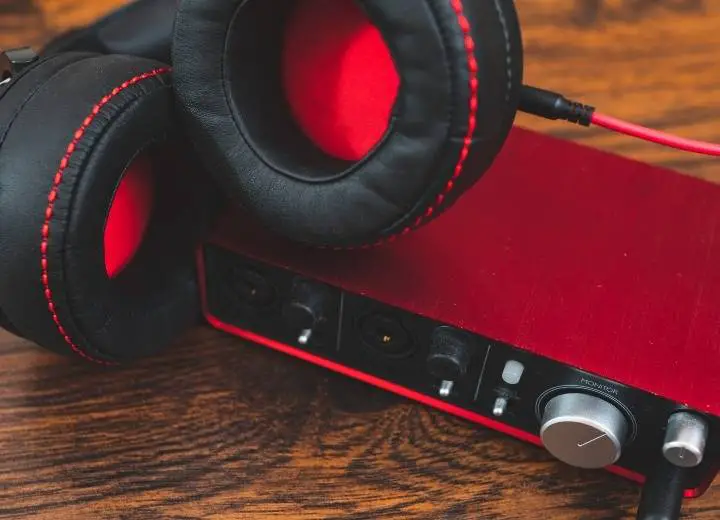
The audio interface acts as a connection between the computer and the recording mic. Use the XLR cable to link between the interface and the microphone, the sound after your output will be in digital format on the computer.
The device has a built-in microphone preamp and phantom power that can be a good interface. These features will make it compatible with all your microphones.
#4. Shield Pop
At first glance, the Pop shield is not very important, but a professional collector cannot do without it. This is a device that effectively reduces noise and makes the voice look clearer.
Because the recording process cannot avoid the noise from the environment, even if it is very small, your mic can still be recorded.
The most recognizable feature is the “pop” sound. When registering with a phone, this strange sound appears more clearly.
#5. Pair of headphones
There are two types of headphones that you can use in the studio: closed-back headphones for listening first and open or semi-open headphones. If you make music, you need both.
With closed-back headphones to listen first, you will no longer hear any outside noise, but the sound quality is inaccurate. When recording, you need to use one like this.
Some pretty good machines for you to learn are Sennheiser HD280 or Sony MDR 7506.
Mixers using this headset will get a more natural and quality sound. However, you may be disturbed by outside noises. You can refer to Beyerdynamic DT990 Pro or AKG K701.
#6. Support software
No matter how good your voice and equipment are, the sound after recording cannot be 100% perfect. Therefore, audio editing software plays an important role in creating great works.
Many programs do this well, of which Audacity, GarageBand, Adobe Audition, and Pro Tools are quite popular and familiar to professionals.
Audacity is free and easy to use. It is compatible with both Windows or Mac, so you will not spend too much time downloading.
GarageBand is a free software dedicated to the iOS operating system. It is suitable for those experienced and who want to thrive because the usage is a bit more complicated.
Adobe Audition is a good recording and editing software for professionals. It has many advanced audio editing and mixing effects. However, unlike the above two programs, this application has a fee.
Pro Tool appears in most modern studios. The application can allow you to record, edit, mix or do anything on your recordings. It works well on both Windows and iOS. The investment for this program is worth what you will get.
Find studio space
You don’t have to have a huge room or a completely new construction area. Make the most of what you have at home, space just enough for your devices and comfortable to stay there for hours.
A good recording environment will probably take the longest to find. It has to make sure there is no echoing sound after you speak out.
At the same time, it is not affected by outside noises such as car horns, other people’s laughter, or the “meow” of a cat, etc.
To get a space like that, you need an ordinary empty room or a soundproof building room. For those who have earned a steady income from this job, spending some money on the right space is well worth it. Besides, it will help you make more money in the future.
For those who are new to the profession who are not too picky about the workplace, you can use the available spaces. Areas such as under the stairs, basement, car, or even a closet full of clothes all make perfect recording locations.
Soundproofing the studio
Your workspace will be ideal if you apply excellent soundproofing tips to the room. Use soundproof materials such as rubber, fabric, and mattress to block noise.
Or choosing a perfect room from the beginning is also an effective solution.
#1. With limited budget
Install cork, rubber, or foam on windows, walls, and ceilings. These items have very good noise resistance.
Besides, they are very easy to find at stores selling building materials. You can also cut pieces of PVC pipe, then deep chain them together and hang them around the wall to help with sound absorption.
Another way is to use some thick hanging around the wall, like hanging curtains. Hang more fabric in the corners of the ceiling to create a triangle.
The sound will be more limited to escape. After the mic, you can hang more clothes or blankets to absorb the sound you emit.
Professional voice actors often use mattresses or couches pressed against the wall each time they work. This way, the sound will be better absorbed. However, this method is not completely safe.
Therefore, before starting, you should try again by clapping your hands and seeing an echo. If so, you need to order an extra mattress or chair.
In addition, the long carpet spreading evenly across the room also gives a very good effect. You use the mat to cover every corner of the studio, including the floor and ceiling. In places with many openings, such as doors, you should spread more than 1 layer or use thicker carpet.
In the end, it’s still better to have a completely enclosed room. It may not be very comfortable, but there should be no windows other than the main door.
#2. With a surplus budget
If you have more money and build a whole new studio, you should incorporate soundproofing materials into the walls. Use anti-vibration rubber to stick to the wall. Note to leave excess rubber both on the floor and on the 15cm sheet.
Then, you press the aluminum frame close to the wall and glue it with rock wool to ensure all positions are sealed. Just a small gap can destroy the entire soundproofing work, so you must be meticulous in this step.
Next, you insert the soundproof airbag into the surface of the skeleton. The final job is to fix the wall with plaster. The wall will be thicker than usual to finish, but the character will be the same as other walls.
This method of soundproofing is very effective. At the same time, you have to spend more time, effort, and money than in previous ways.
Finish the design
Organizing your work supplies and decorations is the final step to completing your home recording studio.
When you have purchased all the necessary equipment, selected a suitable location. Try to make all the soundproofing for the room, then arrange the machinery to facilitate your working process the most.
There is no rule about how to arrange items. It all depends on your taste and taste.
Conclusion
What is the method to build a home recording studio for voiceovers? Do you already know where to start? Take it one step at a time. So you don’t miss an item.
It will take some time, but you are sure to be fine with the result. Wish you will create an area for yourself, the ultimate creative land.