
Thanks to the constant advancements in digital technology, anyone can build a professional studio. However, not everyone does it properly.
With the steps below, you can build your own professional-quality recording studio.
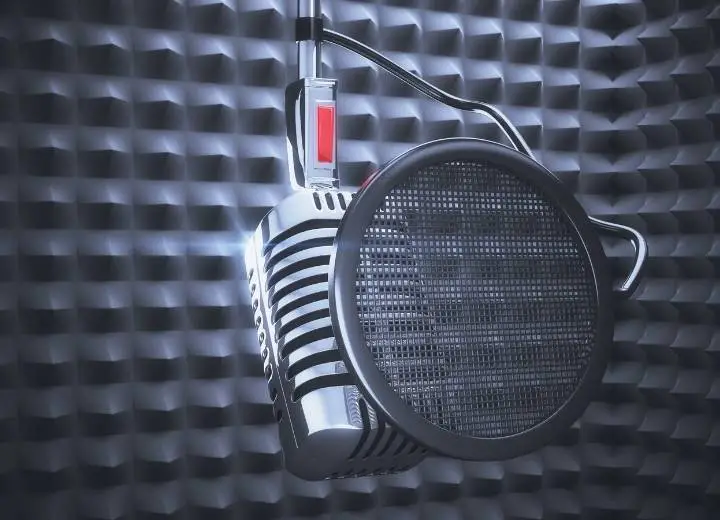
10 easy steps to build a soundproof studio room
If you are planning to build a recording studio, the following guide is useful for you. Here are 11 steps to building a soundproof recording studio:
- Step 1: Find the right location
- Step 2: Pay attention to the light
- Step 3: Seal the doors
- Step 4: Pay attention to the ventilation system
- Step 5: Build a room within a room
- Step 6: Do not hide the power
- Step 7: Using floating floors
- Step 8: Adjust the absorption and diffusion of the room
- Step 9: Consider: One room or two?
- Step 10: Don’t try to build for a day!
Step 1: Find the right location
When it comes to building a studio, you need to decide on its location. You need to consider the ambient noise level and how soundproof your studio is. This is very important because it directly affects your studio.
Step 2: Pay attention to the light
Daylight is very important. It is one of the very important factors in creating a beautiful workplace.
In fact, the lack of light can make your studio look terrible. Sealing windows is essential to soundproofing a studio. However, you can use a soundproof glass panel.
A soundproof glass panel will do a great job of soundproofing while it allows the light to enter your room.
Step 3: Seal the doors
Your studio will have at least one door. In fact, both doors and windows are a potential area for sound leaks. To improve this problem, you can use a heavy door.
Another great solution is to apply a layer of Sheetblok on the door. Sheetblok is a vinyl material. It acts as an effective sound isolation barrier.
You need to make sure that both the doors and windows seal completely when closed. You can easily purchase sealing strips at convenience stores.
Step 4: Pay attention to the ventilation system
As mentioned above, you will need to seal the windows and doors. As a result, your room will be completely soundproof. However, you will have to find the answer to the question “how will you breathe?”
In fact, this is something that a lot of people don’t pay attention to. They do not know that the lack of air can make them unconscious, even life-threatening.
There is no denying that the supply of air into the room is extremely important. It not only ensures your safety but also protects your audio equipment.
Step 5: Build a room within a room
The fact of the matter is that there are many studios that apply the ‘room within a room’ principle. That means they build a separate room with minimal contact with the original building. They do this to ensure their studio is effectively soundproofed.
You need to start with creating a new wall with high density concrete blocks inside. You need to attach thin neoprene under that wall. As a result, the new walls do not come into direct contact with the floor.
Next, you need to use acoustic wall ties to attach the new walls to the outer walls. If you have soundproofed the original roof with mineral wool and a few layers of plaster, apply the same approach to the second roof.
For the internal walls, you can apply special materials to increase the soundproofing effect. Some recommended options are foam, fibreglass, wood, fabric, and more.
Step 6: Do not hide the power
Many people think they should hide lighting and power cables behind new drywall walls.
Unfortunately, cutting out the sockets can lead to the destruction of the soundproofing you’ve just worked so hard to build.
It is best to ensure that all power sources are surface mounted. Alternatively, you can also create another area for the plugs and power supply using plasterboard and wood.
Step 7: Using floating floors
In general, the purpose of this is the same as that we apply the ‘room within a room’ principle. That means the purpose of floating floors is to separate the two surfaces to prevent vibrations from travelling through.
To do this, you need a wooden board on top of the rubber U-Boat supports. You need to make sure that the distance between the rubber U-Boat supports is the same.
In addition, you also have another solution for lifting individual kits off the ground. That is using PlatFoam. This is a cheaper and simpler solution.
Step 8: Adjust the absorption and diffusion of the room
When building a soundproof recording studio, you need to deal with the sound reflection of the wall. It is wise that you combine two solutions including diffusion and absorption.
Sound diffusion refers to the separation of sound travelling in different directions. Therefore, it causes breaking up the sound. Meanwhile, absorption can reduce unwanted sounds. This is the time when you can use the egg carton.
The shape of egg cartons will make them quite good at diffusing sound. However, their material is not very effective in reflecting and absorbing. Also, they are not very eye-catching!
Instead of using egg cartons, you can also try the following solutions:
#1. Soundproofing foam
People love to use soundproof foam for professional recording studios. It is the common name of sound-absorbing foam and sound blocking foam.
In fact, a lot of people can’t tell them apart. So they often use them interchangeably.
Sound blocking foam has the ability to prevent noise from travelling through the walls. It has completely different properties than sound absorbing foam. In particular, it is heavier and more massive.
It has a closed-cell structure. The denser and thicker the acoustic foam, the better its ability to block noise.
Sound blocking foam is very useful in blocking outside noise. If your problem is outside noise, sound blocking foam is a good solution.
On the other hand, sound-absorbing foam has good sound absorption ability.
Sound absorbing foam comes with a flexible open cell structure. Thanks to that, this foam has extremely good sound absorption.
Its working mechanism is very simple. This foam can convert sound energy into heat. Thanks to that, it can absorb sound very well. It can improve the sound quality in the studio.
Sound absorbing foam and sound blocking foam have completely different uses. Therefore, you need to consider them carefully before using them.
#2. Fabric
This material is also a popular choice for many soundproof studios. They not only have the ability to soundproof the studio, but they can also make your studio more eye-catching.
#3. Wooden
Perforated wood is also a great solution for soundproofing. This method is suitable for smaller home studios.
#4. Fiberglass
In fact, many audio professionals appreciate the use of fiberglass for studio soundproofing.
#5. Soundproof panels
Soundproof panels Acoustic panels work best with the medium frequency range of reflected sound. For soundproof studios, often hang soundproof panels on the wall or ceiling.
#6. Diffuser
The diffuser is also the perfect solution for home recording studios. However, it doesn’t seem as popular as acoustic panels and bass traps.
#7. Bass traps
Bass traps are one of the perfect sound processing methods. It has the ability to absorb bass frequencies.
Most cách âm chuyên nghiệp studios use bass traps in the walls and corners of the room. There are also many recording studios that apply bass traps for the floor and ceiling.
Step 9: Consider: One room or two?
After creating a soundproof space for the recording studio (or practice room), you need to consider the control room. In particular, you need to consider whether you need a separate control room.
In fact, for a professional recording studio, you need to create two rooms. One room is for recording and the other for playback. However, some veteran musicians think otherwise. They find it easier to work in the same room as the equipment.
In general, the choice is entirely up to your needs. You need to carefully consider the factors to make the best choice.
Step 10: Don’t try to build for a day!
Building a soundproof studio is not an easy task. It will definitely cost you a lot of time and money. Surely you will fail many times during the build process.
Therefore, you need to carry out the procedures carefully. You also need to carefully consider the factors before making a decision.
Conclusion
Hopefully, this article contains useful information for you. Building a soundproof studio is not the job of a hasty and sloppy person!
Therefore, you need to be patient and careful. Just follow the steps above and you will soon have a perfect soundproof studio.