
What is the method to make guitar recording sound professional? What do you need to pay attention to?
The guitar audio does not operate like the vocal ones. Hence, producers have to consider the equipment setup carefully.
If you are planning a guitar record project, you are at the right place. This article will give you comprehensive guidance on dealing with it.
Let’s read on to discover!
How To Make Guitar Recording Sound Professional?
- Step 1: Make sure you purchase the best-sounding instrument for the record.
- Step 2: Choose the best mics you believe will work. That is the ideal microphone for the task if you have one. To get the greatest sound out of your guitar, simply move it around a bit more.
- Step 3: Spend some time moving the mics around to find the optimum spot for them.
- Step 4: Start recording.
For closer observation, you can watch this video.
Tips For Making Guitar Recording Sound Professional
In the said instructions, steps 2 and 3 require lots of effort. You may need some experience, skill, and knowledge to carry them out.
We will share with you some tips to smooth the process.
Tip 1: Employ the Dynamic Microphone
When working in a home studio, we usually advocate recording guitar DI and utilizing an amp simulation. But we will get to that later.
There are many reasons why you should record your guitar amp instead of utilizing amp simulation. So let’s start with that.
If you take this path, we strongly advise you to use a cardioid dynamic microphone.
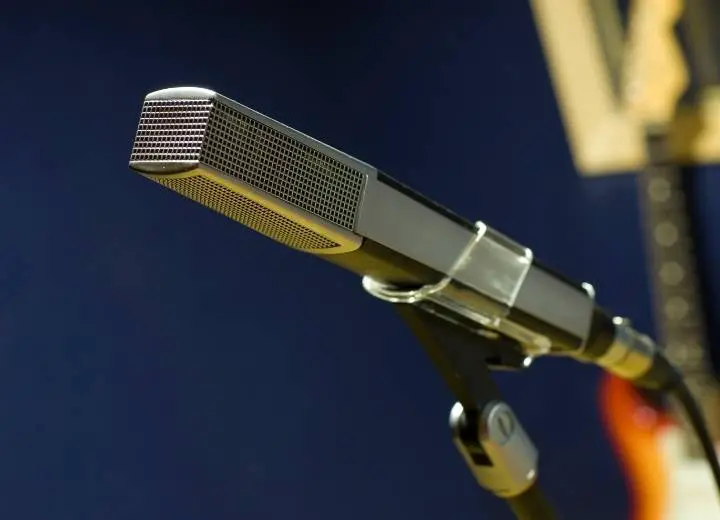
Cardioid dynamic microphone is a perfect tool for guitar recording
Rear-facing cardioid mics reject sound. This is perfect for a place in which the acoustics are not the best.
When tracking electric guitar, dynamic microphones are less exposed to extreme frequencies. Electric guitars have relatively little high-frequency content. That kind of content is unnecessary in this mix.
You’d better use a low-pass filter in the mix stage to eliminate everything across the 10kHz from guitars. In a home studio setting, there is little incentive to utilize a condenser microphone.
In fact, the condenser mic can bring you lots of benefits. Watch this for detailed steps.
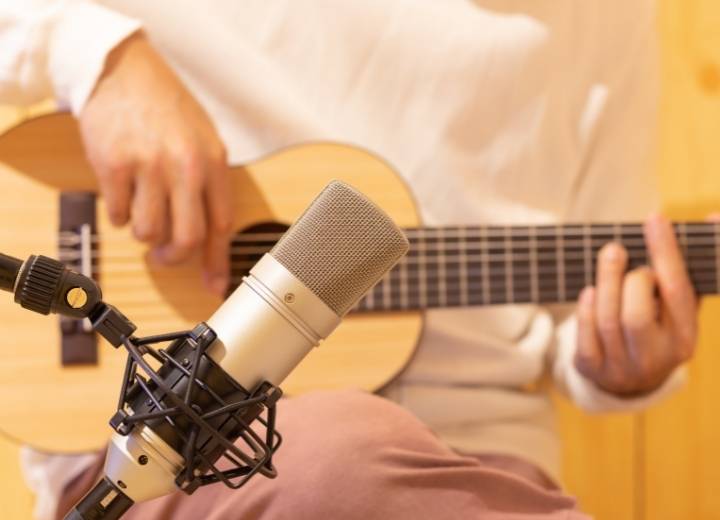
Tip 2: Place the microphone close to the amplifier
The main microphone should lie as near to the amplifier as possible. This lowers the amount of noise and reflections in your room.
It is also the most straightforward way to get the correct tone. In general, a range of 0-5′′ works well.
Some individuals like to utilize two mics, one near to the amp and the other a little further away. This second mic may mix for a more spacious sound.
You can attempt this if you have a backup microphone. However, we find that it is rarely necessary. Choose a dynamic microphone once more, and make sure the phase is correct while mixing.
To avoid phase difficulties, you may need to slightly delay the near mic during mixing. If it seems too difficult, don’t sweat it. Simply determine in the mix whether the room mic improves or degrades the sound.
Tip 3: Identify the correct tone on the amp
During the recording process, a lot of producers become enthusiastic. This causes them to hurry. Make sure you don’t make this error. Spend a lot of time tweaking the tone settings on the instrument and the EQ on the guitar amp.
Your objective is to capture a guitar tone that requires no adjustment in the mix section.
Remember to set the bass knob down a few levels as a general guideline. On the guitar, you wouldn’t need a lot of low-end.
Tip 4: Modify the tone by changing the position
To begin, locate the speaker driver. Then, place the microphone midway between the middle and the outside of the speaker cone. Make sure that the mic is close to the cone.
Listen to how the tone fluctuates as you move it from side to side.
As you approach closer to the speaker’s center, the tone becomes clearer and more forceful. The tone becomes deeper and rougher as you approach the cone’s edge.
There is no right or incorrect solution in this situation. Place the mic where the tone best matches the music.
You may also alter the tone by adjusting the mic’s angle. Please spend some time experimenting with the microphone and moving it around. Experiment with new locations and angles to find what works best.
Tip 5: Identify in the mix
Play the guitar along with the tune as you move the microphone around. This is to find the perfect location.
After that, obtain access to your interface. Then, using the channel controller in your headphones. Modify the level of the instrument until it fits correctly in the mix.
You may now shift the mic around and listen to how the guitar performs in the mix. This is more efficient method of working.
The only thing that counts is that it sounds nice in the mix.
In solos, a brilliant, melodic tone may sound terrible. However, with the right mix, it could sound fantastic.
Tip 6: Utilize the reference record
If you’re having trouble finding the correct tone, you may compare it to a reference record.
Look for a song with a guitar tone you enjoy. Download it into your DAW and have it ready to listen.
Check the tone you’re recording and compare it to the one on the reference tape.
Raise the high points and put the instrument nearer to the speaker cone if your guitar seems dull. Do the exact opposite if it sounds uninteresting.
Tip 7: Adjust the tone while overdubbing
Within a composition, it’s typical for guitarists to overdub and perform many sections.
You may repeat the same chord sequence. One portion should be panning hard left. Meanwhile, the other should be hardpan right.
Change the tone gradually any time you record a new section. It is a wonderful approach to generate additional distinction and space in the mix.
Changing pickups is a good idea. Let’s make a little movement with the mic. Don’t forget to adjust the tone knob too.
Tip 8: Apply less distortion
On a record, distorted guitars may sound more broken than they perform live.
On the other hand, heavy distortion may quickly take up space in the mix and cause a variety of issues on a record.
Guitars appear to be more distorted in the audio. So, you do not have to add as much distortion.
You can utilize an amp simulation to create extra distortion if you want it. You may get trapped with it if you work with too much noise.
Tip 9: Guitar direct
You have to make some sacrifices if you would like to build radio-ready mixes in your home studio.
The simplest approach to get professional guitar recording at home is to record guitar directly and use an amp simulation.
Some believe that amp simulation is lacking in ‘mojo.’ This is sometimes true. If you have a preferred amplifier, you may never be able to duplicate the sounds digitally.
In most situations, recording guitar directly and utilizing an amp simulator will yield superior results. Ensure you are using a good DI box if you choose the direct guitar sound.
Tip 10: Use some headrooms
When recording directly, be sure you have more than enough headroom. A clean guitar may be quite powerful.
Try not to exceed a -10dB peak. When creating the product digitally, you do not need to record fast.
Tip 11: No bass
In a home studio, you may not require a bass amp. It will result in a slew of problems.
In a new room, the major issue is bass vibrations. So it’s a bad idea to record bass via an amp.
Instead, record directly and simulate the amp. Surprisingly, a large number of professional producers will follow suit.
Conclusion
Now you may know how to make guitar recording sound professional. In general, the steps are simple. The quality of your recording depends on how you position the tools and employ them.
If you need any further information, please feel free to ask. We will be right back to assist you.
Thank you for reading.